Copyright © 2003 The JDAI Developoment Team (www.jdai.dk)
Abstract
This is the user manual for JDAI Explorer. The manual is written in docbook/XML in order to use the same pages in the online help, on the web page and on printouts - it is work in progress, and any suggestions and additions are welcome!
This is $Revision: 1.4 $ of the manual, covering JDAI Explorer 0.4.
Table of Contents
JDAI Explorer is the main album application for JDAI. This application is used for organizing and viewing your collection of digital photo albums.
JDAI reads photos from JPG files - if the files contain EXIF info that is used in the applications as well. Any files with an extension other than .JPG (case insensitive) are ignored by JDAI.
JDAI Explorer will never modify the original photo files (on purpose) except when deleting photos from your albums (and even then it will ask politely before deleting). The reason for this is that the photo files are regarded as "negatives" - a medium from which the photos can be transferred to other media (paper, your screen, the web, ...) for viewing.
Thus, when you rotate a photo or enter keywords or captions, this information needs to go somewhere else. The approach used in JDAI is to store this in an XML Photo Information Store located in every directory.
Start JDAI Explorer using the command:
java -jar jdai.jarIf your photos are very large (4 megapixels and above) it is recommended to let Java use a larger heap size than the default 64MB. This is done by using the command:
java -Xmx128M -jar jdai.jarwhich allows Java to take up 128MB when needed.
JDAI Explorer aims at being the preferred photo organizer for personal photo collections. The project was started because the founders needed an application for managing their own personal photo collections - and no existing application seemed to do exactly what was needed.
The design criteria for JDAI Explorer include:
Photo organization is prioritized over image editing (in fact the only "editing" included is rotation)
EXIF information in photo files is integrated into the applications - specifically EXIF thumbnails
JDAI Explorer is the primary organizer application - other frontends (such as the web frontend) use the information managed by JDAI Explorer
All management of a photo collection must be possible from within the JDAI Explorer; this includes:
Creating new sections
Moving and copying photos between sections (drag/drop)
Deleting photos
Entering caption text and keywords for photos and sections
Viewing sections (thumbnails) and photos
Currently implemented features include:
File manager-like application with common operations
drag/drop of photos between sections (use the mouse; press and hold Ctrl to copy instead of move)
add sections (deletion is planned)
delete photos
extensive key bindings (see Key Bindings)
Fast thumbnail view when managing EXIF photos (thumbnails are generated and cached for non-EXIF photos)
Rotation of photos
Photo viewer with navigation (including slideshow), zooming and fullscreen functionality
Entry and display of photo captions
Entry of photo keywords and section caption/keywords (for use in the upcoming search functionality)
Planned features include:
Renaming of sections and photos
This feature will include standard manual rename, but will also be able to rename series of photos (e.g. all photos in a section). When renaming a series, the use enters a series prefix, e.g. "Vacation", and the photos will be renamed to Vacation01, Vacation02, etc.
Better section tree
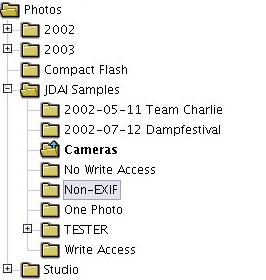
The section tree will be able to be better controlled by the keyboard, and will better indicate the currently displayed section along with the active section node (the active node is the node having the keyboard focus, or the target node for a drag/drop operation.
In the figure above, the Cameras section is currently displayed, and the Non-EXIF section has the keyboard focus.
Support for HTML formatting in photo/section captions
For now, this is considered "nice to have" (as opposed to "need to have"), and may be postponed for a while.
Randomized slideshow
This feature will include random slideshow of the entire photo collection - when run in fullscreen this will be a nice screensaver!
Deletion of sections
Please contact the developers on the mailing list with suggestions and priorities (or implementation patches).
The JDAI Explorer offers key bindings for all operations. Simple accelerator-type shortcuts (such as ALT-F for the file menu) is displayed in the GUI with an underlined mnemonic - just like most other applications.
Table 2. Section Tree Shortcuts
| Key | Operation |
|---|---|
| Up/Down | Move the selection within the section tree |
| Left/Right | Expand/collapse sections with subsections |
| RETURN | View the selected section in the photo list |
| Insert | Add a new subsection below the selected one |
| SHIFT-F10 | Popup menu |
Table 3. Photo List Shortcuts
| Key | Operation |
|---|---|
| Return | View the selected photo in the zoomable photo viewer |
| Delete | Delete the selected photo(s) |
| ALT-Left/ ALT-Right | Rotate the selected photo(s) left/right; Note: On some keyboards from IBM (others?) back/forward buttons are located by the arrow keys - these keys can be used too |
| SHIFT-F10 | Popup menu |
Table 4. Photo Viewer Shortcuts
| Key | Operation |
|---|---|
| Home/End | Go to the first/last photo |
| PageUp/ PageDown | Go to the previous/next photo |
| SPACE | Go to next photo |
| F9 | Toggle fullscreen mode - Note: the fullscreen mode only works correctly under Linux (and possibly Mac?); under Windows it has been replaced by maximizing the window |
| ESC | Close the viewer |
| Arrow Keys | Move the photo around (with SHIFT modifier, move in smaller steps); this can also be done by simply dragging the photo using the mouse |
| +/- | Zoom in/out (with SHIFT modifier, zoom in smaller steps); this can also be done by right-clicking the mouse and dragging right/left |